Sparkle, Dimension, and Unexpected Shapes
These cards highlight another die from the Simon Says Stamp DieCember® release. (See the whole release here.)
Techniques:
I pulled out some sheets of Spellbinders die cutting glitter foam I’d gotten at a local store one time, and thought they’d be perfect to try with some dies for a festive card or two. Have you tried these? They really do cut amazingly smoothly with the thin wafer dies. (I cut mine on a Spellbinders Platinum 6 machine, but I’m sure it will work on most.)
Because I had the bright and sparkly snowflakes (jacks), I wanted to keep the background monochromatic and white as a background for those. To keep it interesting, and on theme, I used a cover die to cut white cardstock - creating great texture and pattern detail to place on the white card front. Before I glued it on, I sprayed the die cut panel with shimmer spray so it has great interest, and complements the glittery snowflakes well.
With all the pattern, shape, and sparkle on the card I knew the greeting needed to be a more simple black and white. I chose this nice hand lettered script style one because it is compact, and also provides a nice organic contrast to the geometric shapes on the rest of the card design.
Techniques:
As I was die cutting the Bundle of Jacks die, I noticed the negative shapes created inside the ring of jacks. I felt it had a snowflake feel to it, so I decided to make some cards with those pieces.
The Star Lattice embossing folder created a good coordinating background. The shapes are similar, and the pattern is much smaller than the snowflakes I was placing on top, so the two work together well.
I decided a very simple and subtle greeting was going to be best on this card. It didn’t need a lot of contrast or anything bold—I had enough bold with the pattern and texture and bright hot colors.
A few diagonal stripes of cardstock help provide a graphic ground all the snowflake pattern from the die cuts and the background.
Colors:
cardstock: Concord & 9th Dragonfruit, Sweet Pea, Poppy, and Lemongrass. Spellbinders glitter foam (pink and red).
Techniques:
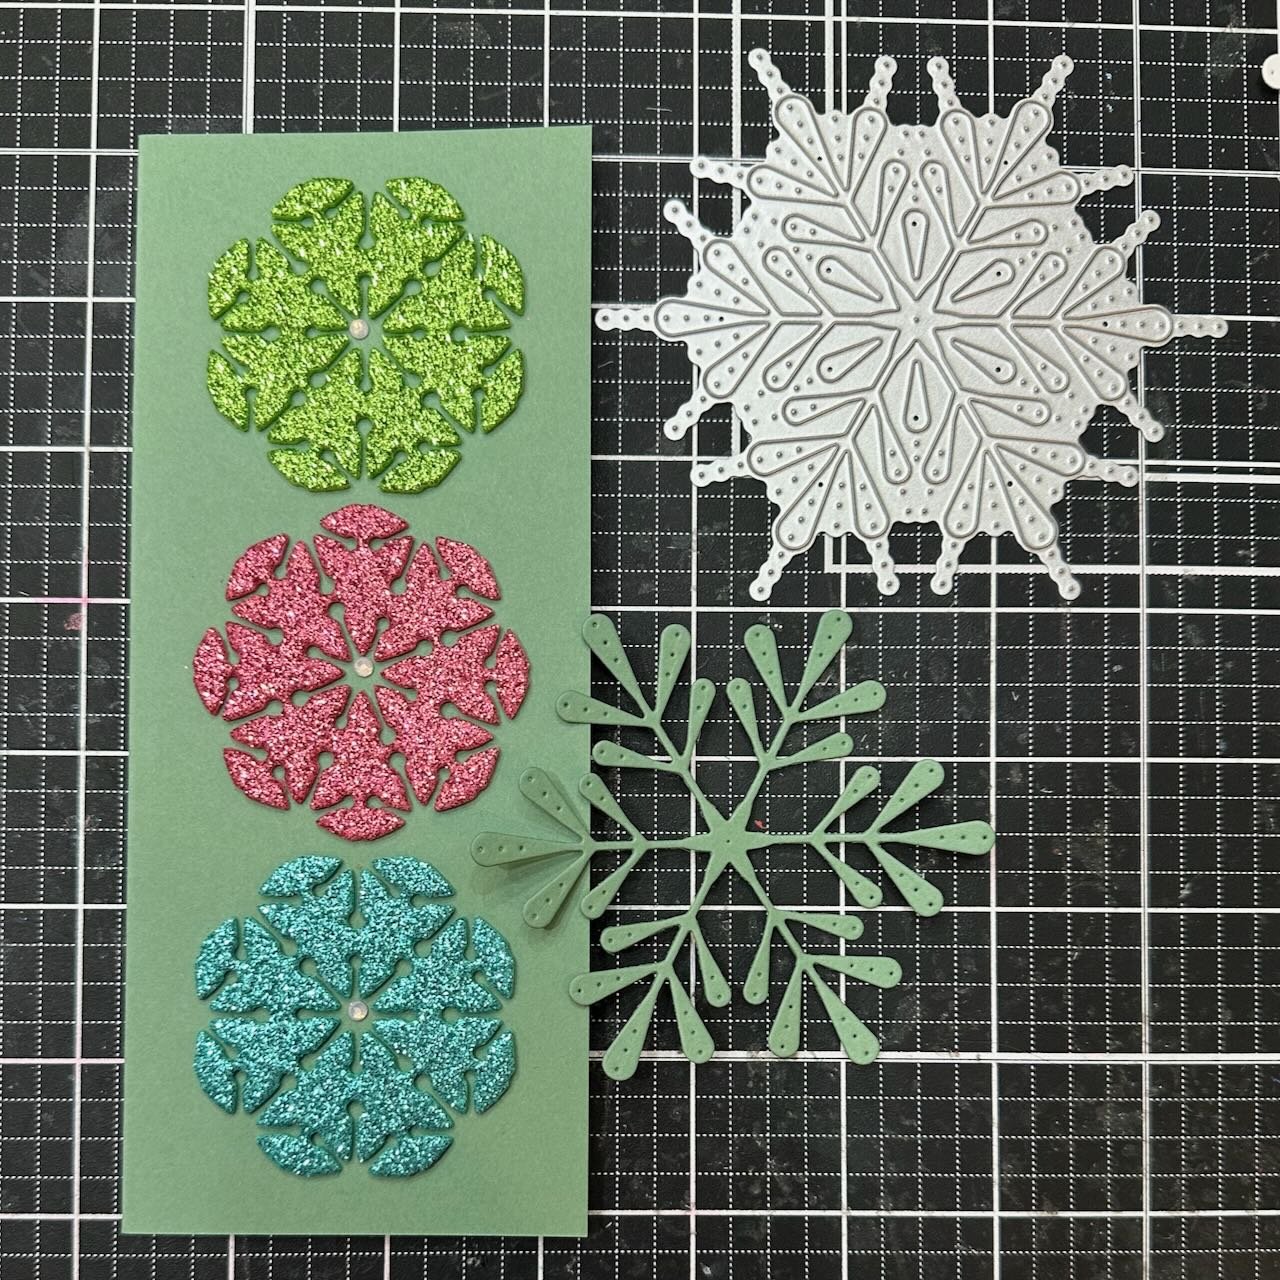
This card uses the same “scraps” from the Bundle of Jacks die as card 2, but this time I did a more traditional symmetrical layout on a slimline card.
To add some decorative detail around the edges, I used the Grand Pixie Snowflake wafer die. See the detail image below to see how I positioned the snowflake die cut to use the tips in the corners of the card and on the right and left sides to fit between the glitter foam snowflakes.
By using cardstock the same color as the card base, these added die cuts add a subtle texture detail that isn’t too busy or distracting. They support and ground but let the sparkle and bright colors remain the focal point.
The repetition of the curved tips in both snowflake shapes helps these different designs work well together.
I selected three of the pearl-colored gems from the Pawsitively Dazzling Gems to use in the centers of the three foam snowflakes, and added the greeting in matte silver cardstock.
Colors:
cardstock: Simon Says Stamp Sage. Spellbinders glitter foam (Bright Green, Light Pink, and Teal).
I have at least one more card I’ll be adding in here. Possibly more.
Thank you for visiting! Keep an eye out for more inspiration from this DieCember® release!
Links are below if you’re interested in any of the products I used.
*Affiliate links do not cost you any more when you shop, but it is beneficial to creators when you use them, so thanks in advance!


