Something Different - A Birthday Party Challenge
STAMPtember is here. (Catch the first live here if you missed it.) This post is a collection of cards using the new Birthday Party stamp set. This stamp set includes some really sweet illustrations of cute kids decorating for a party. But, as cute and as well done as these are, I’ll admit that when I first saw the stamp set I wasn’t sure what to do with it.


This card makes use of the stamp set - and doesn’t require you to use the die to go with it. When I saw this set I immediately thought the Heart Banners stencil would coordinate well with it… but I don’t have it and didn’t think I could order and get it in time. I checked my collection and found the Lava Lamp stencil that I DO have and thought I could use like streamers.
Techniques:
I planned out the layout so my elements would fit on well, and then cut my cardstock base so the front panel would be more narrow. My plan was to stamp the ladder image on the “inside” / back panel and have it show on the front, so I wanted to be sure the spacing worked for that.
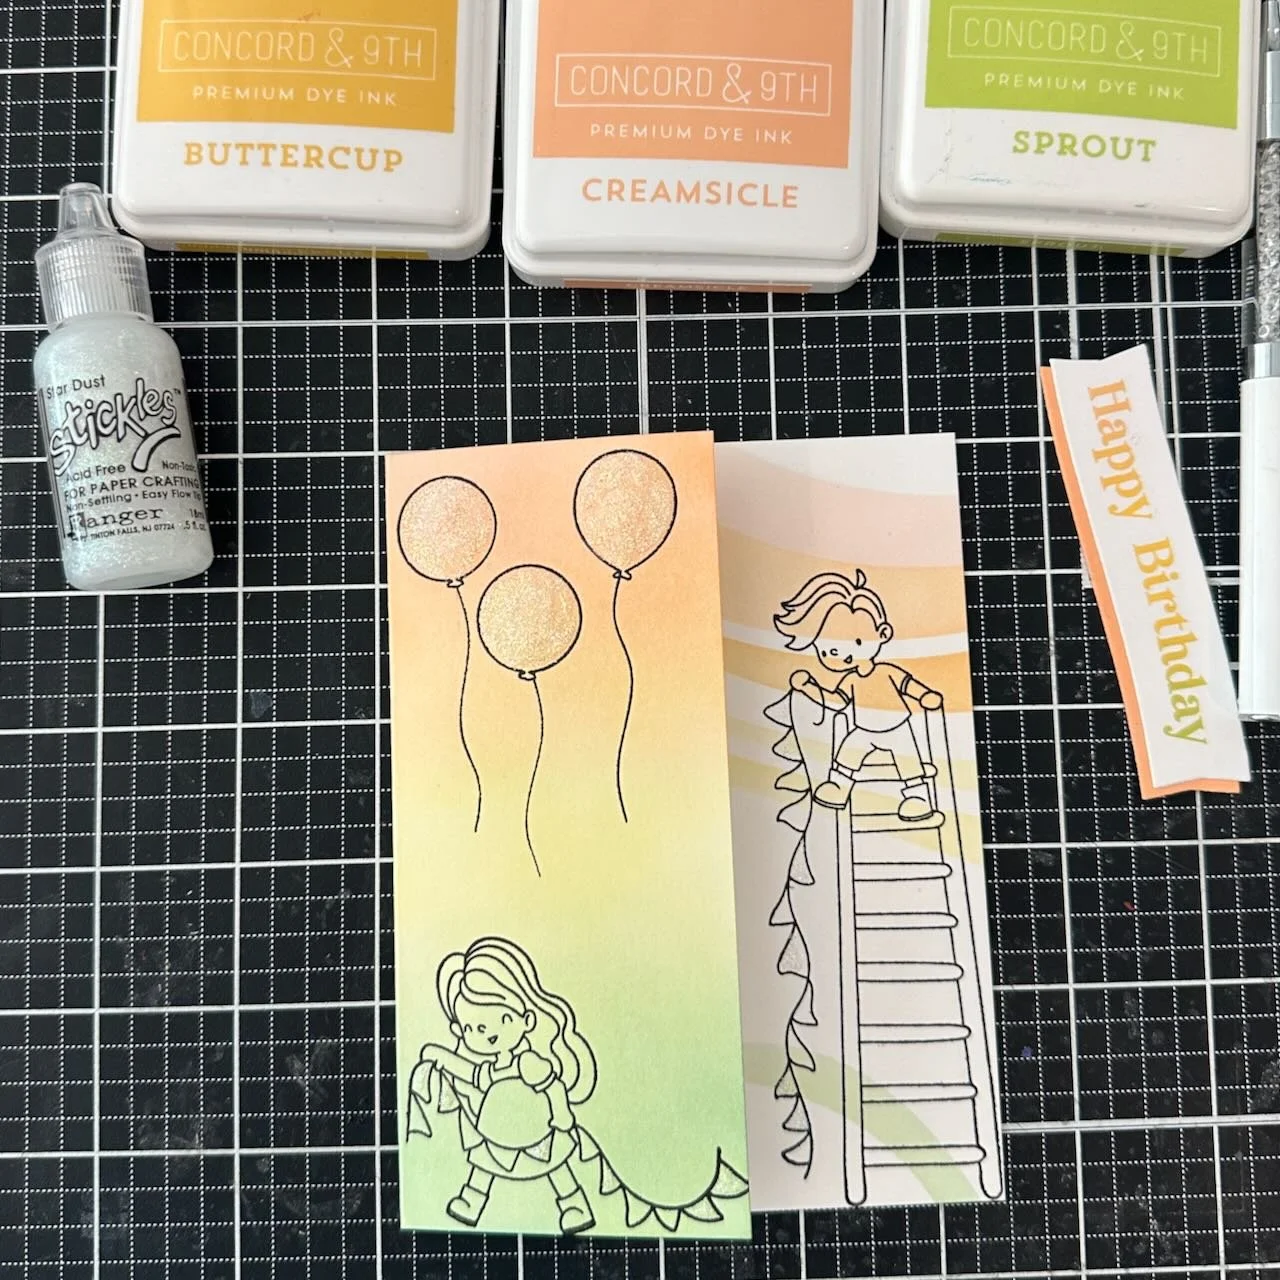
This set immediately made me think the Heart Banners stencil would coordinate well with it… but I don’t have it and didn’t think I could order and get it in time. I found the Lava Lamp stencil that I do have and decided I could use it like streamers. I used just a few of the layers to ink blend on the inside.
On the front of the card, I used the same colors but in a solid blend. I thought it would be better balance than more pattern, and less busy, especially knowing I’d be stamping the outline images also.
I filled in the balloons on the front with Stickles for a little extra fun.
To coordinate, I stamped the Happy Birthday with a blend of the same three colors. I die cut and attached it centered on the card, so it had some overhang on the front panel . It helps to visually connect the two layers.
Colors:
cardstock: Concord & 9th Creamsicle. Hammermill white.
ink: Concord & 9th Creamsicle, Buttercup, and Sprout. Versafine Onyx Black.


After I made the first card, I got a chance to use the dies (crafting with a friend) and had die cuts for this next card.
Techniques:
I wanted to make this one somewhat interactive, because I think that makes cards so much more engaging for the recipient. (I think I’ll be giving this to one of my nieces.)
The card base is a side folding card with thin strops of foam tape along the fold, the top, and the bottom edges, with the right side left open.
Before adding the foam tape, I die cut a balloon from the front panel, and layered a piece of yellow cardstock inside behind that area. (I used the second from smallest die from the Balloons Wafer Die set at Simon Says Stamp.)
The inside panel is stenciled with the Layering Sprinkles stencil. I used coordinating colors to color the boy and girl stamped images.
Since I added some sequins on the yellow balloon space, and the inner panel has to slide in, I made sure to glue them so the open side is down. I just used a little more liquid adhesive than usual and let them dry completely before putting the pullout piece back in, and they seem to stay fine and are not in the way.

Colors:
cardstock: Concord & 9th Watermelon, Honeysuckle, Harbor. Hero Arts
ink: Concord & 9th Watermelon, Buttercup, Sprout, Harbor, Dove. Versafine Onyx Black.

Thank you for visiting! Keep an eye out for more STAMPtember fun!
Links are below if you’re interested in any of the products I used.
*Affiliate links do not cost you any more when you shop, but it is beneficial to creators when you use them, so thanks in advance!

It began on September 1 with a huge new product release, and is an online celebration all month long. There are over 30 limited-edition collaborations with some of the wonderful companies who are part of this industry that will be coming too. You can find all the details on the Simon Says Stamp blog here.