Linear Details
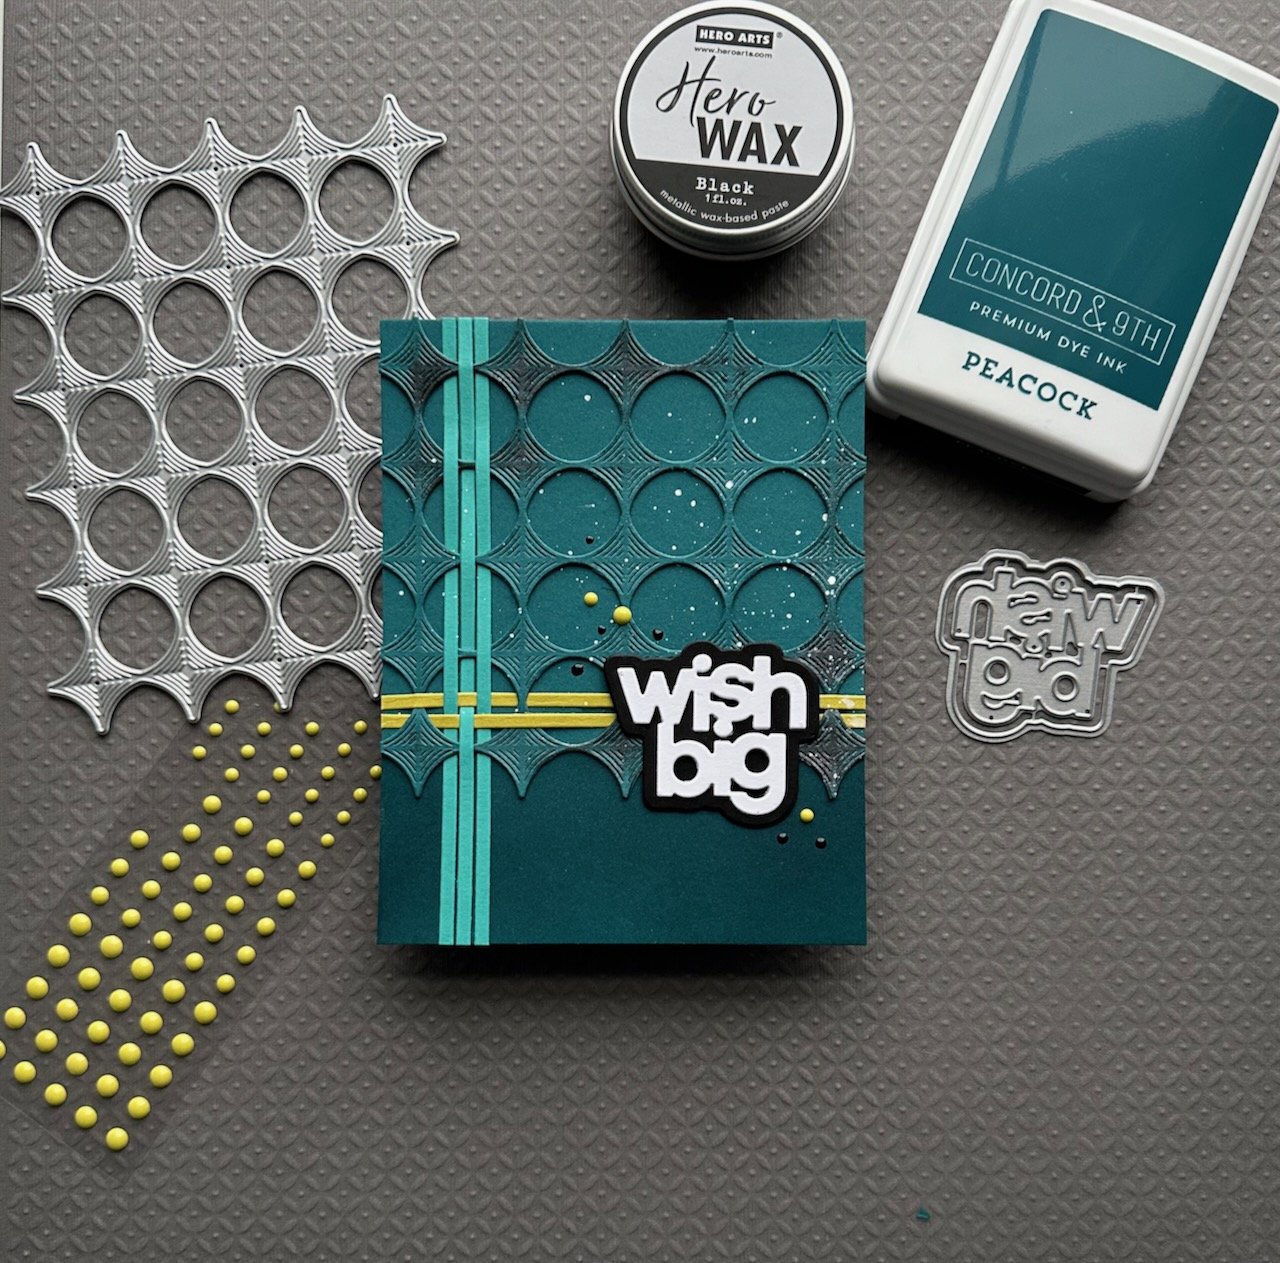
When I saw the Diamond Whirl Die from Simon Says Stamp I knew I wanted to play with it in as a tone on tone layer. As usual, the card went in a different direction than I had originally planned (weaving!), but often that’s one of the best things about the creative process.
I thought this die would look great in a deeper color, so when my order arrived I cut it out of Peacock cardstock. The linear details in the diamond areas of this die are stunning, and I wanted to enhance them even more, so I rubbed on some black Hero Wax in some areas with my finger. (I wanted just a thin layer, without defined edges. I knew that “finger painting” with it would accomplish that, and would get it into the spaces and edges better while not losing the texture.) The wax is a great medium for that because although it is black, the metallic properties it has also reflect light, so it creates different effects at different angles and in different light.
Brighter colors would play well off the intensity of the Peacock and create some contrast, so I pulled out some Oceanside and Lemongrass scraps. I was going to use a larger section of those colors, but cut some thin strips to try (playing off the linear details in the die cut) and realized they could layer through the open spaces of that die cut. They became a woven accent.
As I pulled in those brighter colors, I realized I needed more depth in the darker Peacock I was using for the die cut and the card base. I had already decided to use the die cut horizontally, so it would cover the full side to side and leave the lower portion of the card open. I masked off that lower space, and blended on some Peacock ink, just to deepen the color.
(This is a great way to create deeper shades of cardstock colors you have.)
Now that the parts were all ready, I wove in the strips, and secured those and the die cut to the background with Connect Glue. I used the great “Wish Big” die cut from Simon Says Stamp to cut the words out a few times from white, and the shadow layer from black, and glued all that together.
Before I glued that on, I added a little extra detail to the background with some white gouache splatter. (Then added the greeting once that was dry.) A few Lemongrass enamel dots and some drops of black Nuvo Crystal Drops added the last details it needed.
Thank you for visiting! I hope you get some time to create something soon.
Links are below if you’re interested in any of the products I used.
Supply list*:
(Listed by company, with links to Simon Says Stamp)
Concord & 9th -
Gina K Designs -
Hero Arts - Hero Wax - Black
Simon Says Stamp -
Whirl Diamond Plate Wafer Die
Wish Big Wafer Dies
Tonic - Nuvo Crystal Drops - Ebony Black
*Affiliate links have been used with no cost difference for you.


