My 2023 Holiday Card
I have a tradition of making and sending cards each holiday season. I think I’ve done it every year since I graduated from college and got married, but there may have been a year or two early on before I started.
I try to keep it interesting and unique as I design it each year.
It isn’t ever a standard single fold, standard shape/proportion card. Sometimes it has a pocket, a unique edge, a unique fold, layers or textures or an element to lift, turn, etc.
It may be punched, printed, stamped, or attached, but there is always at least one star.
Even though the colors center around Christmas and holidays, the primary color each year is different than it was the year before.
Since our girls were born, there’s always a little something about them for far-away family & friends, but done as short facts or words rather than a long letter.
They’re a lot of work, but I enjoy the challenge and the process.
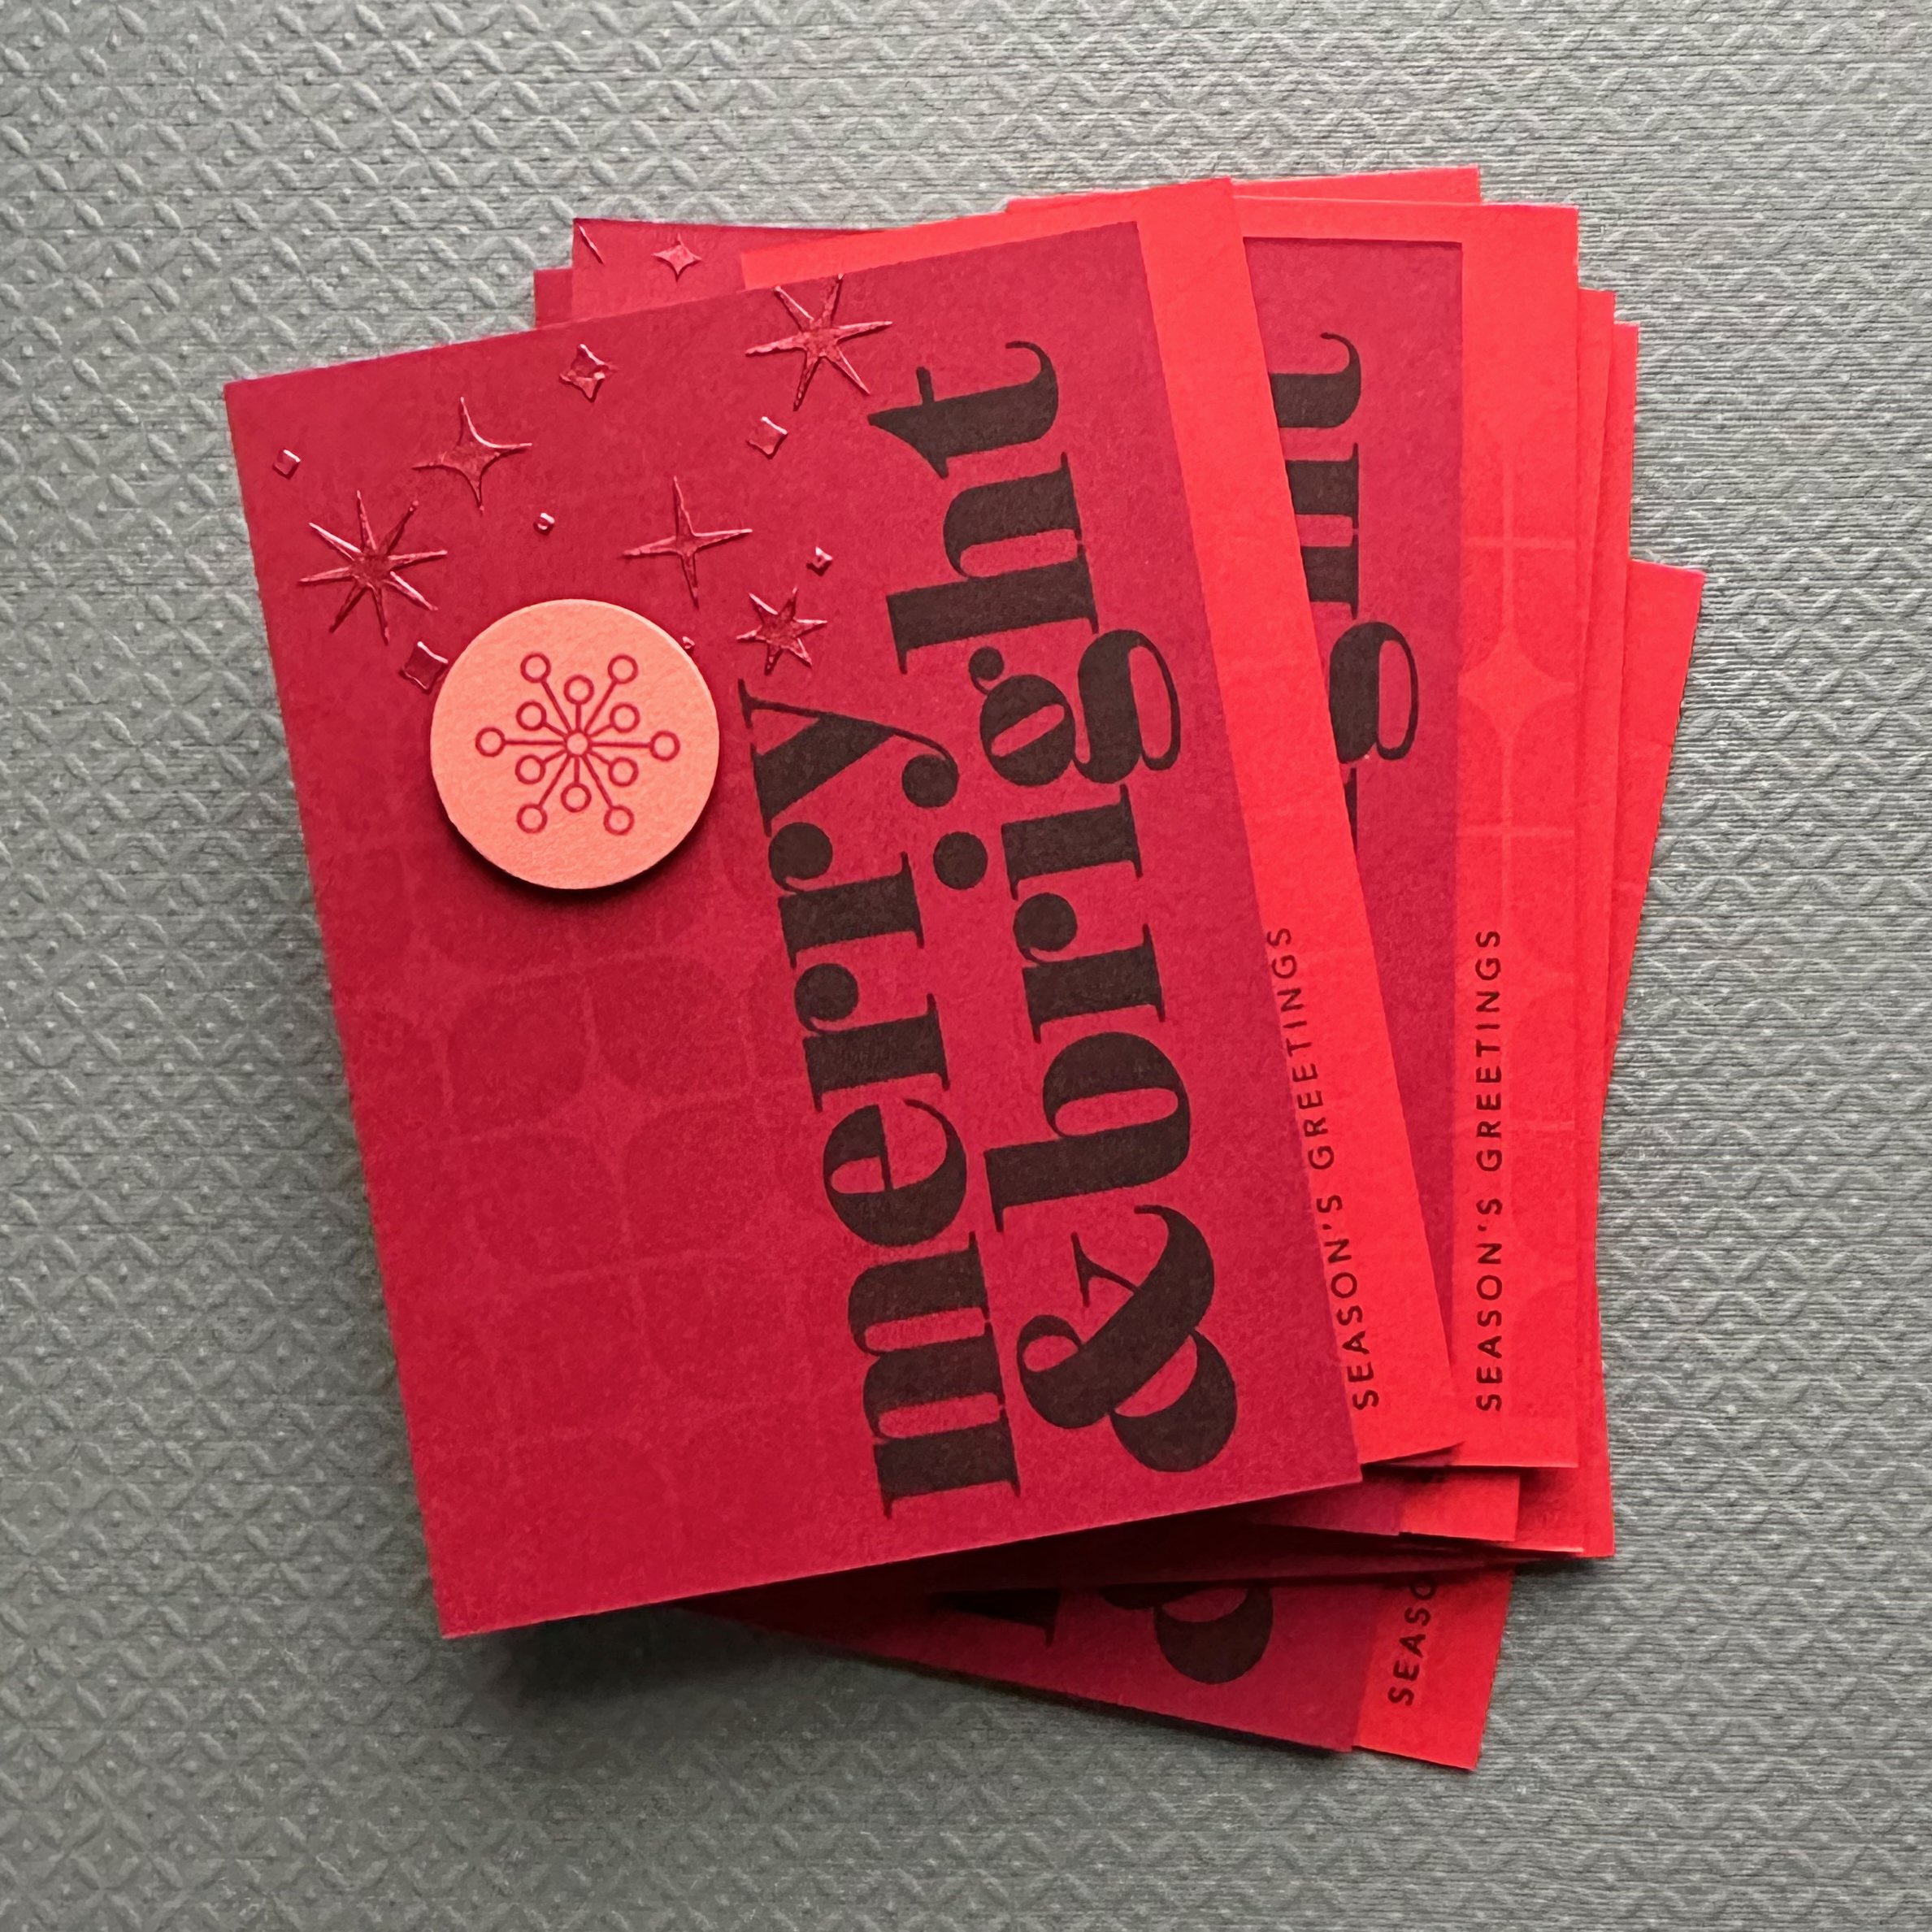
Here’s a closer look at this year’s design.
This card uses a mix of products from different companies that I thought worked well together to create the design I wanted. (You can see details in the supply list below.)
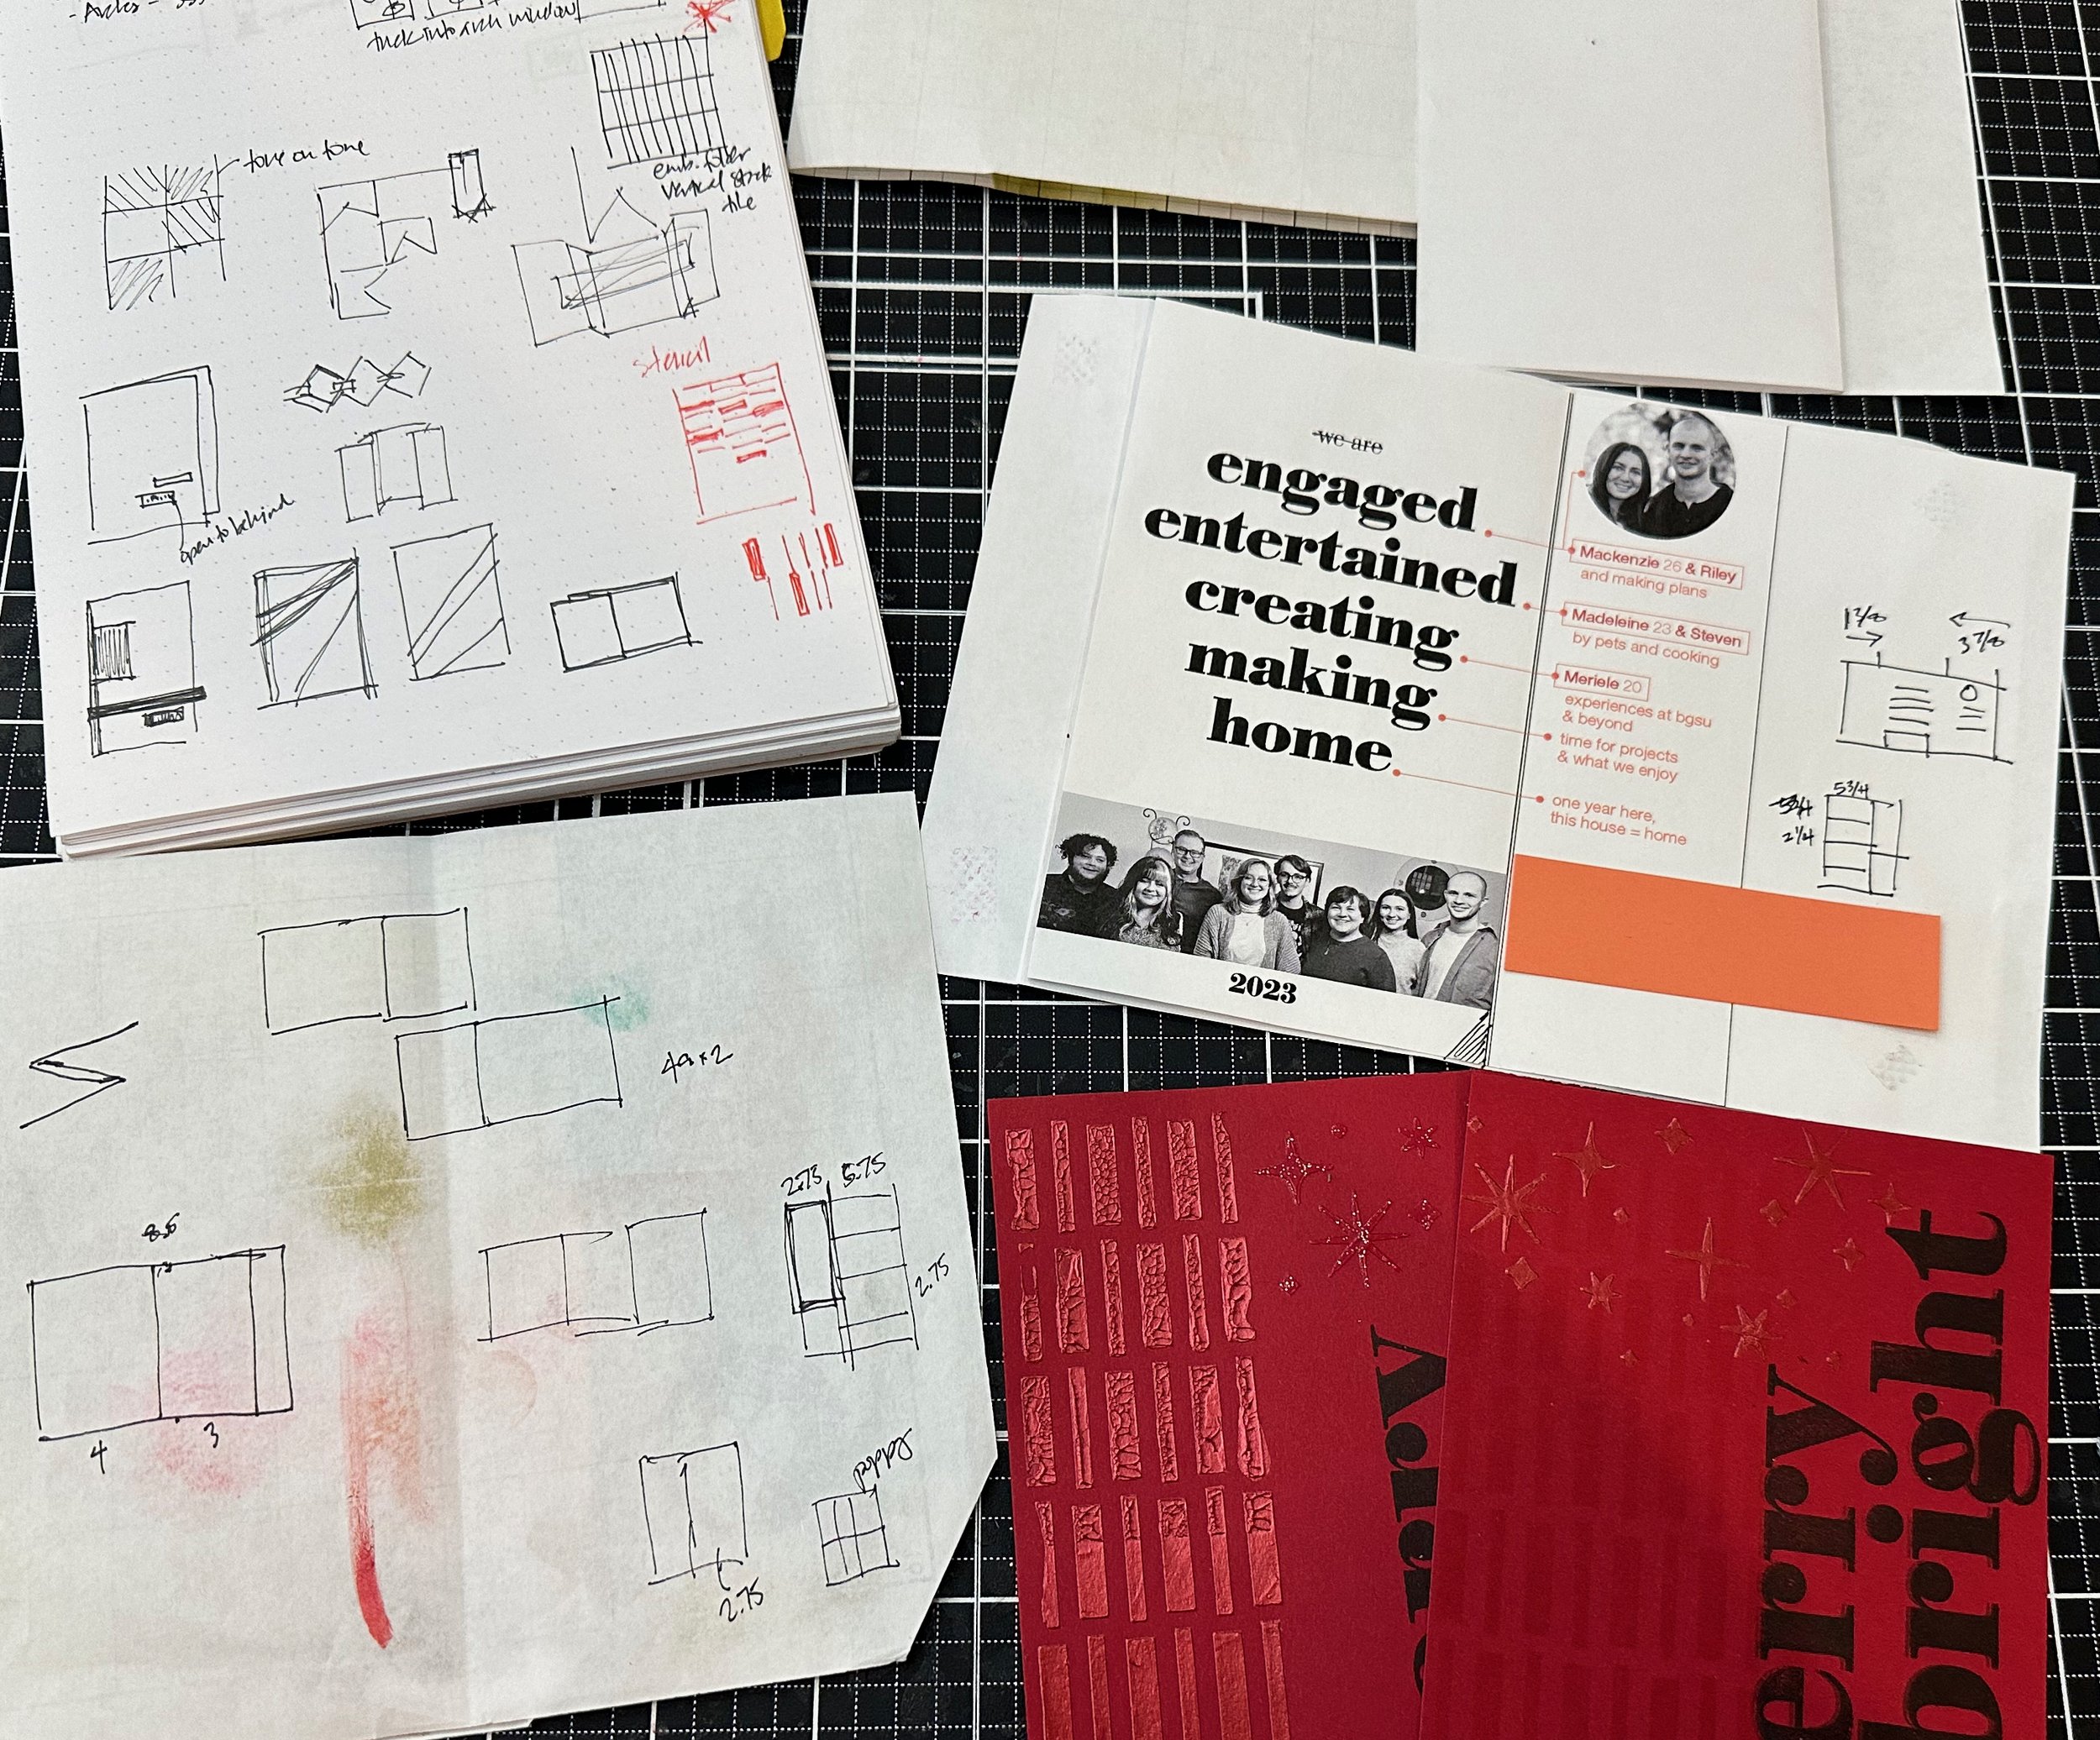
Any designs that aren’t product specific often start out with a few things I know I want it to include. In this case it was the combination of the Cranberry and Poppy reds from Concord & 9th. I also knew that since I had a pocket with inserts last year, and had a front with 3D embossed texture, that I wouldn’t do those things this year. I’d do folds and some other variation with pattern and finish. I take those elements and start sketching some of the ideas that have been simmering in my head. If it is something that involves folds or anything interactive, I often take scrap paper and work out some of the functional aspects of it as well. This picture shows some of the initial sketching, folds, a print of my design and some edits, as well as some of the patterns and different pastes I tried.

When I create this many cards of a design (it was just over 110 this year), I try to engineer it to be as efficient with paper and process as I can. Considering how many of each piece I can get on a sheet of cardstock, etc. Once I’ve gotten sample elements put together, I jump into production mode and do things step by step and then final assembly of the parts at the end.
Here’s a simplified overview of the steps and techniques used to produce this one, once I had the design planned out.
Trim Cranberry and Poppy cardstock to the sizes I needed.
Stencil on both using the Bold Geometric Stencil and Cranberry ink.
Stamp “merry & bright” on the Cranberry panel.
Apply Lunar Paste through the Twinkle stencil at the top of the Cranberry panel.
Trim, score, and fold the inside design that I printed on white cardstock.
Print names on Sorbet cardstock and trim those out.
Cut circles from Sorbet cardstock, then stamp snowflake with Cranberry ink.
Apply foam square to the back of the snowflake circles.
Adhere Poppy panel with dot runner adhesive, name strip over that with the same adhesive, Cranberry panel to the front, and snowflake circle on top of that.


I get a lot of satisfaction seeing the finished design come together, and completed cards stack up, after so much thought and so many iterations at the beginning.
My goal for next year is to get them done (or at least start them) before December. We’ll see if that happens. I still have at least 10 months…


Thank you for visiting! I hope you get some time to create something soon.
Supply list*:
Concord and 9th -
ink: Cranberry
cardstock: Cranberry, Poppy, Sorbet
cardstock: Matte Silver Foil
Gina K Designs -
Adhesive Dot Tape Runner
Simon Says Stamp
CZ Design Coolest Yulest stamp set (older)
Tim Holtz - Mini Stencil Set 57 : Twinkle Layering Stencil
Ranger/Simon Hurley - Lunar Paste: Bee Sting
Hammermill Color Copy Cover
Thank you for visiting! I hope you get some time to create something soon.
*Affiliate links have been used with no cost difference for you.